A Short Guide to Siding Installation (Plus Tips & Tricks)
Learn the basics of siding installation with this short guide — plus handy tips and tricks to ensure a smooth, durable, and stylish finish for your home!
Installing new siding is one of the most effective ways to boost your home’s curb appeal and protect it from the elements. Getting this installation right is key to long-term performance.
This guide walks you through the basics of siding installation. We’ll cover what materials you need, how the process works, and tips to avoid common mistakes. Let’s get straight into it.
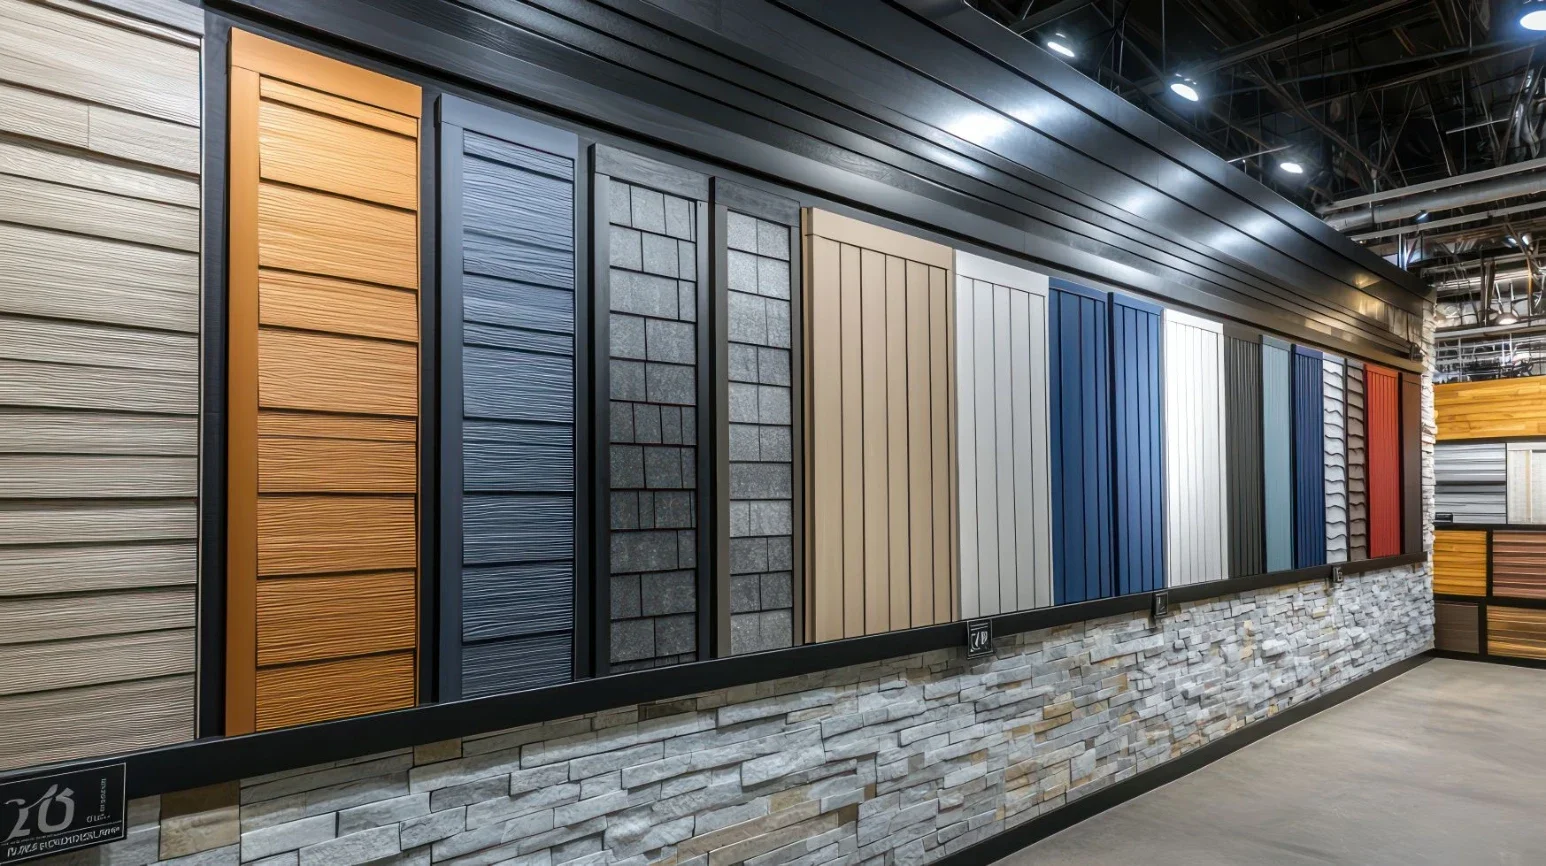
Types of Siding Materials
There’s no one-size-fits-all solution when it comes to siding. Each material has its own pros, cons, and ideal use cases. Here’s a breakdown of the most common options:
Vinyl – Low cost, low maintenance, easy to install.
Wood – Natural look, great insulation, but high maintenance.
Fiber Cement – Durable, fire-resistant, and holds paint well.
Metal – Modern aesthetic, extremely durable, often used in commercial settings.
Engineered Wood – A wood alternative that offers durability with less upkeep.
Stucco – Great for warm, dry climates; not ideal for wet regions.
Brick or Stone Veneer – Premium look and performance, but higher cost.
Each material has trade-offs. Think about climate, budget, and how much maintenance you're willing to take on. Getting this right helps ensure your siding performs well and lasts for years.
Tools and Materials You’ll Need
Installing siding isn’t just about slapping panels on the wall. Having the right tools makes the job smoother, safer, and more professional-looking. Even if you’re hiring out the work, knowing what’s involved helps you ask smarter questions.
Start with the basics, i.e., measuring tape, chalk line, utility knife, and a circular saw with a fine-tooth blade. You'll also need a level, hammer, or nail gun, siding nails, and safety gear.
Don’t forget the starter strips, corner posts, J-channels, flashing tape, and house wrap.
Organizing your tools and materials ahead of time cuts down on wasted effort. It keeps things moving and ensures you’re not rushing to the hardware store mid-project.
How to Install Your Siding in 8 Simple Step

You can seek out local contractors in your area to help with this project. The contractor you choose must have solid experience and have the relevant certifications and insurance. This NJ siding installation contractor has been doing the job for 30 years and has experience with different types of siding, for example.
That said, follow the following steps if you have the skills and would prefer to do the installation yourself.
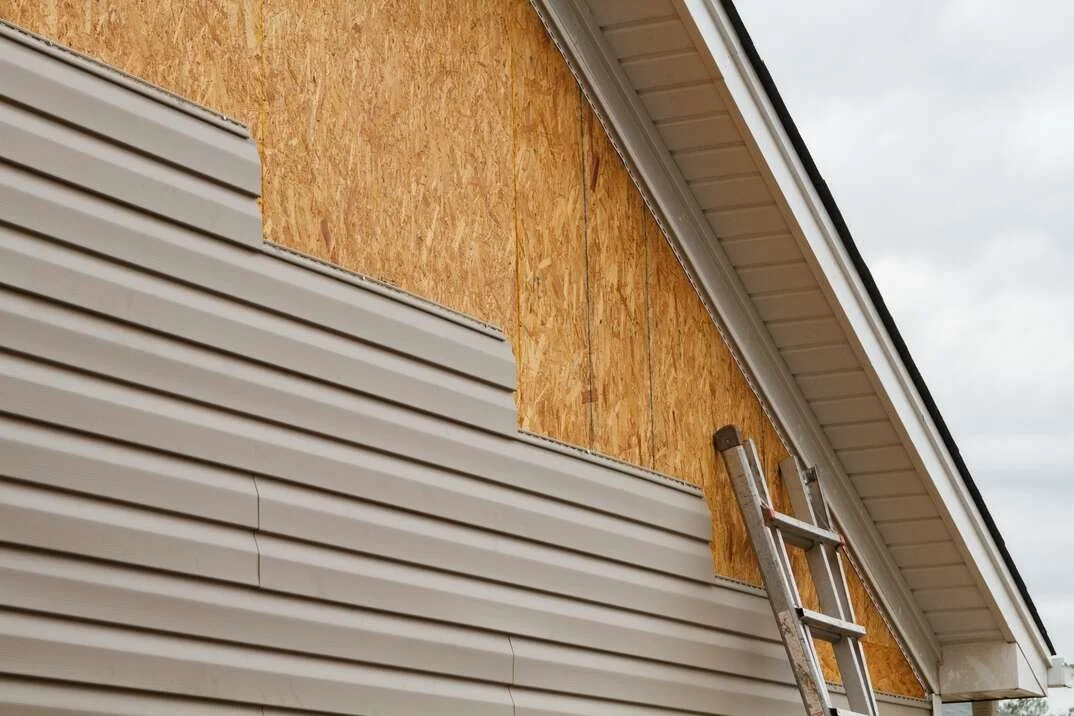
1. Remove Old Siding
Before installing new siding, the old material needs to come off. This gives you a clear view of the sheathing underneath so you can spot damage or moisture issues.
Use a pry bar or siding removal tool. Take care not to damage any flashing, trim, or sheathing unless it needs replacing. Work slowly and safely, especially around windows and corners where nails or screws might be hidden.
2. Apply House Wrap or Insulation Board
This step protects your home from water damage and helps with insulation. It also creates a smooth surface for siding to attach to.
House wrap (like Tyvek): Acts as a moisture barrier and wind block.
Rigid foam board: Adds thermal protection and helps smooth uneven walls.
Tape all seams: Overlap edges and tape carefully to prevent leaks.
Start from the bottom: Work your way up, overlapping each row.
Use cap nails or staples: Secure the wrap without tearing it.
A good weather barrier under your siding adds years of life to your exterior. It also helps reduce drafts and improve energy efficiency.
3. Install Flashing
Water loves to find weak points, especially around windows, doors, and corners. Flashing keeps it out. Miss this step, and you risk rot, leaks, and expensive repairs.
Start by adding drip cap flashing above windows and doors. This directs water away from the opening. Then, apply flashing tape along the sides and base.
Always layer flashing correctly: bottom first, sides next, then the top—so water flows over, not behind.
Corners need attention, too. Use corner flashing or pre-formed vinyl posts that channel water away. The goal here is simple: prevent water from getting behind your siding at any entry point.
4. Attach Starter Strips
These strips are your foundation. If they’re off, every row above will be off too. Accuracy here is non-negotiable.
Measure carefully along the base of the wall and snap a chalk line. The starter strip should sit perfectly level, roughly 1" below the bottom of the sheathing to allow proper water runoff. Use galvanized nails to secure it into the framing, not just the sheathing.
Once installed, double-check the level. A crooked start means uneven siding, and it’s hard to fix that once you’ve begun.
5. Start the First Row of Siding
Now the real build begins. With your starter strip in place, you’re ready to add the first course of siding.
Hook the bottom edge into the starter strip.
Level carefully before nailing into place.
Leave space for expansion (about 1/32") at nail points.
Use corrosion-resistant nails, placed in the center of the nailing slot.
Avoid overtightening. The siding should hang, not be pinned.
This row sets the tone for the entire wall. Take your time. If it’s level and straight, the rest will follow smoothly.
6. Cut Panels as Needed
Not every panel fits perfectly. Around windows, doors, and fixtures, you’ll need clean cuts for a snug, professional finish.
Start by measuring carefully, twice. Use a fine-tooth circular saw for longer cuts and tin snips for smaller ones. When cutting vinyl, work slowly to avoid cracking. Always wear safety glasses and gloves. You’ll also need to leave a small expansion gap at the ends, usually around 1/4 inch, depending on the material.
Use J-channels to frame windows and doors. These not only look clean but also help direct water away from the cut edges. Clean cuts and careful fits make your siding look polished and tight.
7. Continue Siding Up the Wall
Once the first row is secure and level, you can start building upward. Each panel locks into the one below it, creating a clean and weather-resistant seal.
Keep checking for level every few rows. A small error early on can lead to crooked siding at the top. Always stagger vertical seams so they don’t line up and create weak points. Overlap panels slightly to ensure coverage and reduce water infiltration.
8. Finish with Trim
Trim gives your siding a clean, professional finish. It also protects edges, corners, and seams from moisture and wear. Proper trim isn’t just cosmetic. It protects vulnerable edges from weather and helps your siding last longer.
Stay up to date with our latest ideas!