Freestanding Wood-Burning Stove Installation
Learn the essentials of freestanding wood-burning stove installation, from safety tips to design choices, for a warm and efficient home upgrade.
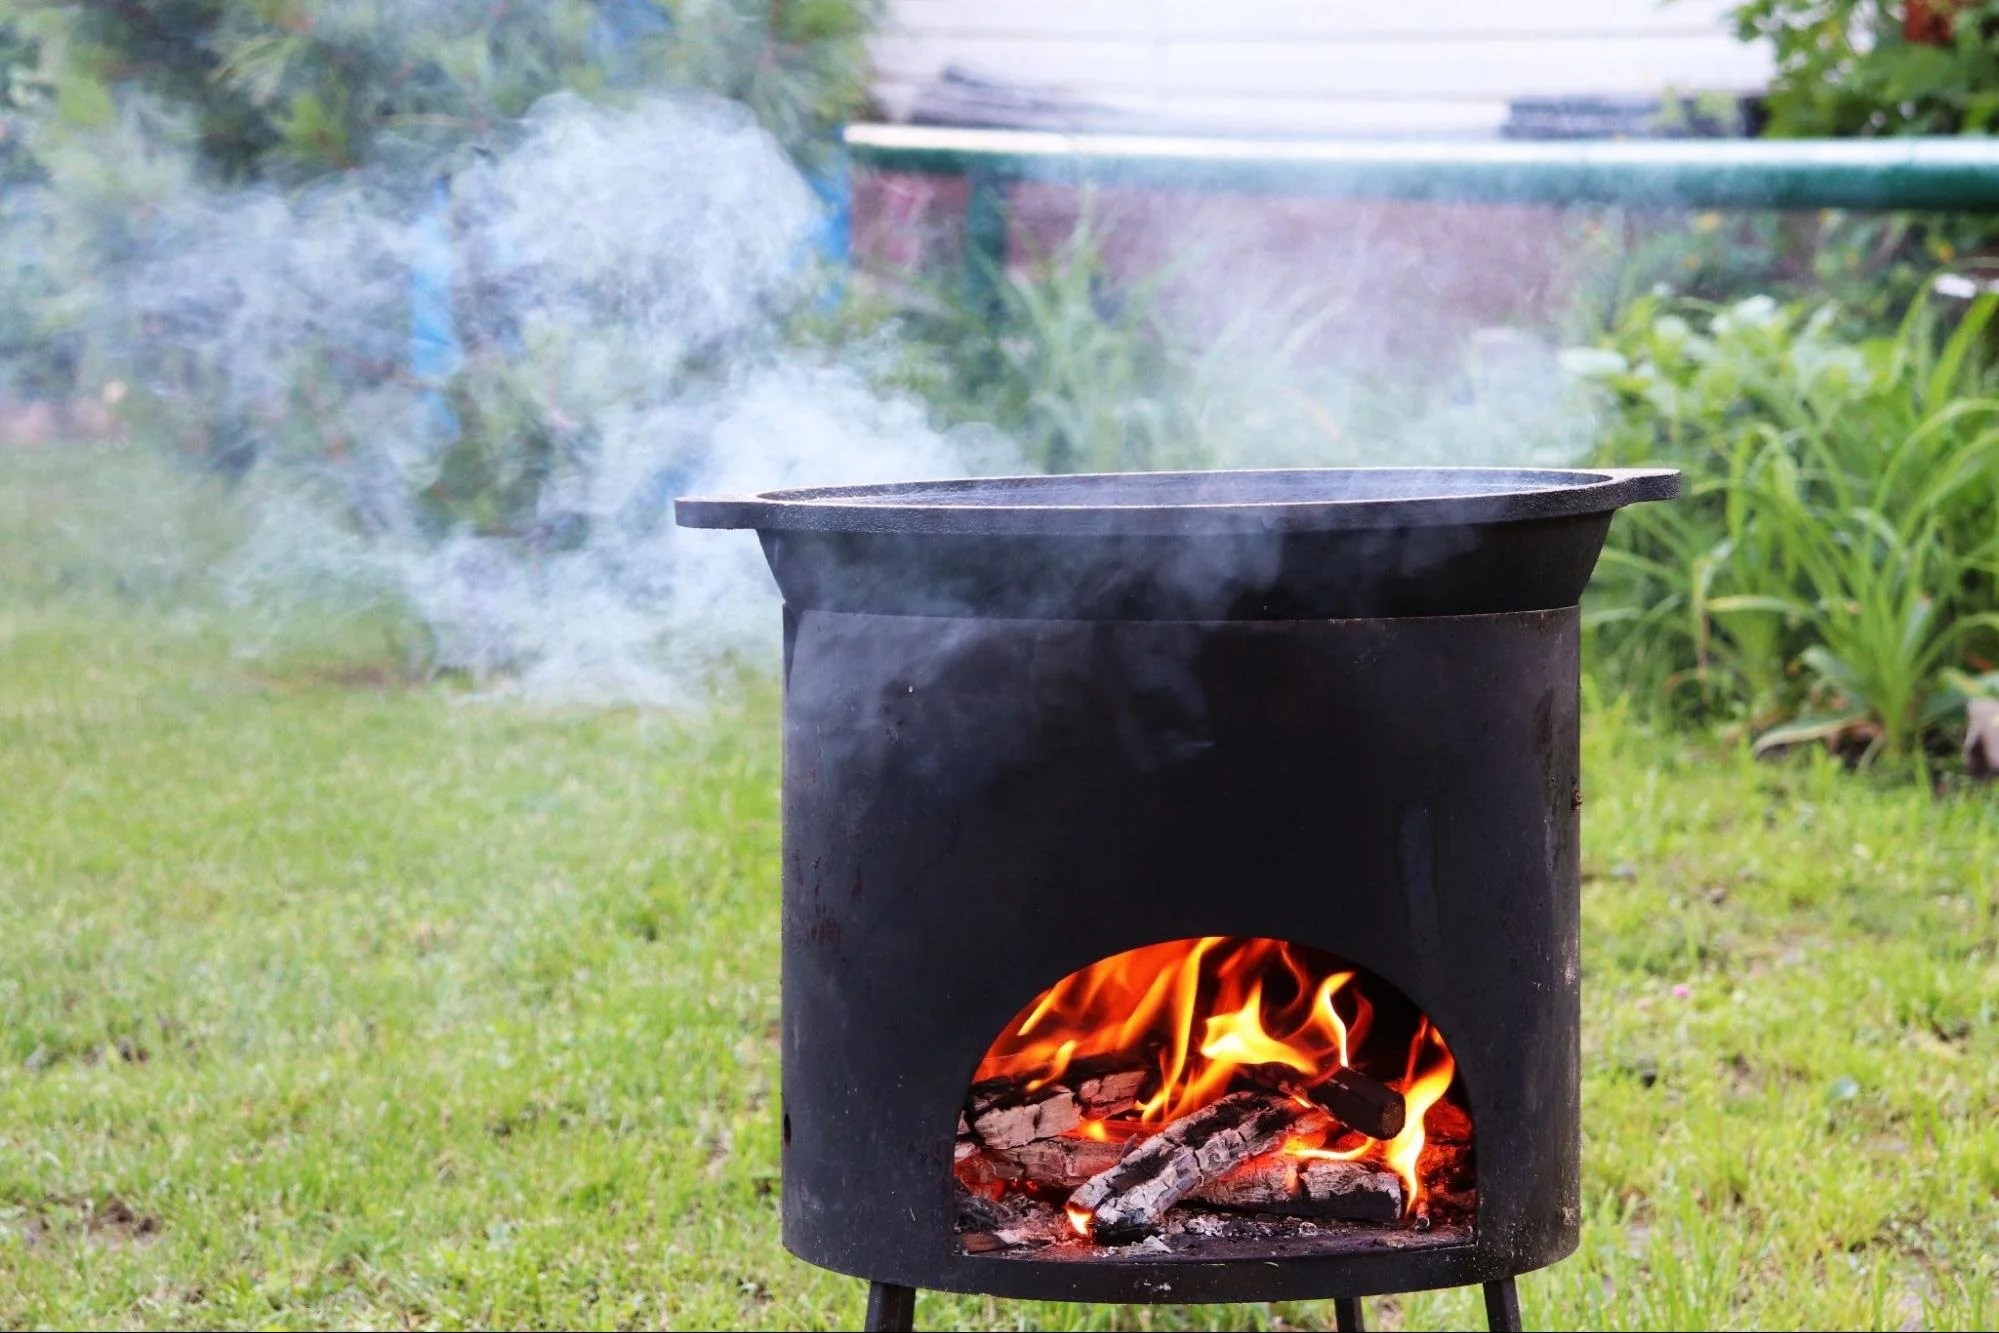
A freestanding stove is one of the most effective ways to bring warmth, style, and a striking focal point to your garden. Whether you're after an outdoor gathering spot for colder evenings or a stylish centrepiece that enhances your outdoor living space, a wood burning stove ticks all the boxes. Unlike built-in models, a freestanding stove is flexible in placement, offers strong heat output, and can significantly reduce your carbon footprint when used properly.
In this guide, we’ll walk you through the essentials of choosing, planning, and installing a freestanding wood-burning stove for outdoor use. From picking the right model and ensuring compliance in smoke control areas, to practical setup advice and long-term maintenance, this article will help you create a warm and inviting outdoor space that works year-round.
Choosing the Right Stove
Before diving into installation, it's vital to select the right stove for your garden. The market offers a huge range of options, including multi fuel, electric stoves, and gas models – but if you want real dancing flames and natural heat, a wood-burning stove remains the top choice. You can also pick an outside pizza oven if you fancy one.
Start by considering how much heat output you'll need. Larger spaces require more powerful models to truly feel the warmth. Many modern stoves come with adjustable vents and advanced combustion features that ensure more heat with less fuel. For those in smoke control areas, always look for DEFRA approved stoves that allow you to legally burn wood outdoors.
The aesthetic is just as important. Whether you're after clean lines for a minimalist look, or something traditional with rustic legs and exposed metalwork, there are models and colours to suit any outdoor setup. Many designs double as both functional heaters and statement pieces – blending style with efficiency, and often becoming the natural centre of your outdoor space.
Planning Your Installation
Proper planning ensures your freestanding stove not only looks great, but also performs safely and efficiently. Start by checking local regulations if you're in a smoke control area. Even for outdoor setups, it’s critical your chosen stove is suitable and compliant.
Next, select the right location. Select a level surface away from overhanging trees or garden structures. The base should be well insulated, flat, and non-combustible – think stone, concrete, or a steel platform. This creates a solid foundation for the stove and prevents heat damage to the ground.
Positioning matters too. To maximise efficiency, place the stove in a sheltered area that still allows for good airflow. If you're adding a chimney or flue extension, ensure it vents vertically and clears nearby structures. Proper ventilation helps with combustion and reduces emissions.
Plan where you’ll store your fuel. A dedicated log store nearby keeps your wood dry and accessible, improving both heat performance and ease of use. Make sure there’s ample space around the stove for seating and safety clearances. This setup not only improves safety, but also encourages use – turning your stove into the centrepiece of an inviting living space.
Step-by-Step Installation Guide
Installing a freestanding wood-burning stove outdoors isn’t overly complex, but it does require care and planning. Here's a straightforward guide to help you set it up correctly and safely.
Step 1: Prepare the Base
Start with a solid, well insulated surface. Concrete slabs, stone tiles, or metal hearth plates are ideal. The base must be non-combustible, level, and large enough to support the full form of the stove, including its legs and any protective surroundings.
Step 2: Assemble the Stove
Unpack your stove and assemble it according to the manufacturer’s instructions. This typically involves fixing the legs, fitting the combustion chamber components, and attaching the glass door or viewing panel. Check for missing parts and ensure all fittings are secure.
Step 3: Install the Flue or Chimney System
Although you're outdoors, a proper flue or chimney system is still crucial for safe combustion and effective heat output. A vertical flue helps with natural draft and reduces backflow. Use insulated flue pipe sections and ensure all joints are sealed to prevent leaks. A rain cap or terminal at the top prevents moisture ingress.
Step 4: Position the Stove
Carefully position the stove on the prepared base. It should be placed in a central, open area that allows heat to radiate evenly. Avoid placing it too close to walls, fencing, or flammable materials. Leave adequate clearance on all sides for safety, cleaning, and maintenance.
Step 5: Connect the Flue and Seal
Attach the flue to the top or rear outlet, depending on your model. Use fireproof sealant and flue clamps to ensure airtight joins. Double-check that the entire route is stable and has the proper clearances to allow safe emissions' dispersal.
Step 6: Test the Stove
Before full use, do a test burn using dry wood or smokeless coal. Watch for strong flames, proper airflow in the combustion chamber, and ensure smoke exits cleanly through the flue. If the stove doesn’t draw correctly or smokes excessively, inspect for blockages or air leaks.
With everything in place, your stove delivers not only reliable heat but a practical and stylish outdoor feature.
Style and Ambience
Beyond its practical function, a freestanding stove has the power to transform your outdoor space. With their clean lines, glowing flames, and strong sculptural presence, modern stoves create a striking focal point and elevate the look and feel of any garden.
To enhance the atmosphere, position your stove at the centre of a patio or seating area. The natural warmth draws people in, making it perfect for hosting or simply relaxing on cooler nights. The glass front allows you to enjoy the flicker of dancing flames, while also giving you a quick view of how the combustion is progressing inside.
There’s a huge range of models to suit different aesthetics – whether you're after a contemporary black steel finish, something rustic in cast iron, or even colours that complement your garden furniture. Some units come with built-in log stores, merging functionality with seamless style.
Freestanding stoves also pair well with outdoor kitchens or covered pergolas, expanding your living space and encouraging year-round use. Whether you're aiming for a natural retreat or a sharp, minimalist look, the right stove helps you create a space that’s as visually impressive as it is warm.
Operation and Maintenance
Once your freestanding stove is installed, using and caring for it properly ensures long-lasting performance, efficient heat output, and ongoing safety. A well-maintained stove not only burns more cleanly, but also keeps your carbon footprint low and extends the life of the unit.
Burning the Right Fuel
Always use dry, seasoned wood or approved smokeless coal. Damp wood reduces efficiency, increases emissions, and leads to creosote buildup in the flue. For those in smoke control areas, only DEFRA approved fuels should be used – even outdoors. Avoid burning treated timber, plastics, or household waste, as they damage the combustion chamber and release harmful toxins.
Cleaning and General Upkeep
After every few uses, remove ash from the base and check that air vents are clear. Clean the glass using a stove-specific cleaner or a vinegar solution to keep the view of the flames clear and beautiful. A blocked view can also indicate inefficient combustion.
Flue Maintenance
Inspect the chimney or flue regularly, especially if the stove is in frequent use. Buildup of soot or tar affects efficiency and poses a fire risk. Use a flue brush or schedule a sweep at least once per season.
Off-Season Care
During warmer months, cover the stove or move it under shelter to prevent rust and water damage. If the stove is a permanent feature, consider a fitted outdoor cover to maintain its durability and appearance.
Regular care and smart fuel choices will ensure your wood burning stove consistently delivers more heat, better efficiency, and lasting style.
Conclusion
A freestanding wood-burning stove is more than a way to burn wood – it’s a year-round enhancement to your outdoor living space. It offers real warmth, timeless style, and a welcome break from the sterile uniformity of electric stoves or gas heaters. With a wide choice of models, clean lines, and efficient combustion, a well-chosen stove becomes a permanent, stylish feature in your garden.
Whether you're drawn to the hypnotic charm of dancing flames or you simply want a more sustainable way to heat your patio, a modern stove can transform how you use and enjoy your outdoor space. Just be sure to plan the installation properly, choose a stove that’s suitable for your needs, and maintain it with care.
A thoughtfully chosen and properly installed freestanding stove doesn’t just provide heat – it helps you create moments, extend seasons, and shape a space where people want to gather.
Stay up to date with our latest ideas!