15 Boy and Girl Shared Room Ideas That Actually Work
Create harmony in shared spaces! Discover 15 clever boy-girl room ideas that balance different styles while maximizing space and privacy.

So your son wants a dinosaur cave while your daughter dreams of a princess palace, and they're sharing one room? Welcome to the ultimate decorating challenge! Creating a shared bedroom for a brother and sister might feel like negotiating a peace treaty between two very different countries, but here's the good news: it's totally doable and can even be fun. Whether you're dealing with a tiny space that barely fits two beds or you're lucky enough to have a larger room to work with, the key is finding that sweet spot where both kids feel like the space is truly theirs. Think of it as creating a room with dual citizenship! From clever color schemes that please everyone to smart storage solutions that prevent World War III over toy territories, these ideas prove that boys and girls can share a room without driving each other (or you) crazy. Ready to create a space where "that's mine!" transforms into "our room is awesome!"? Let's dive into 15 tested ideas that actually work in real family life!
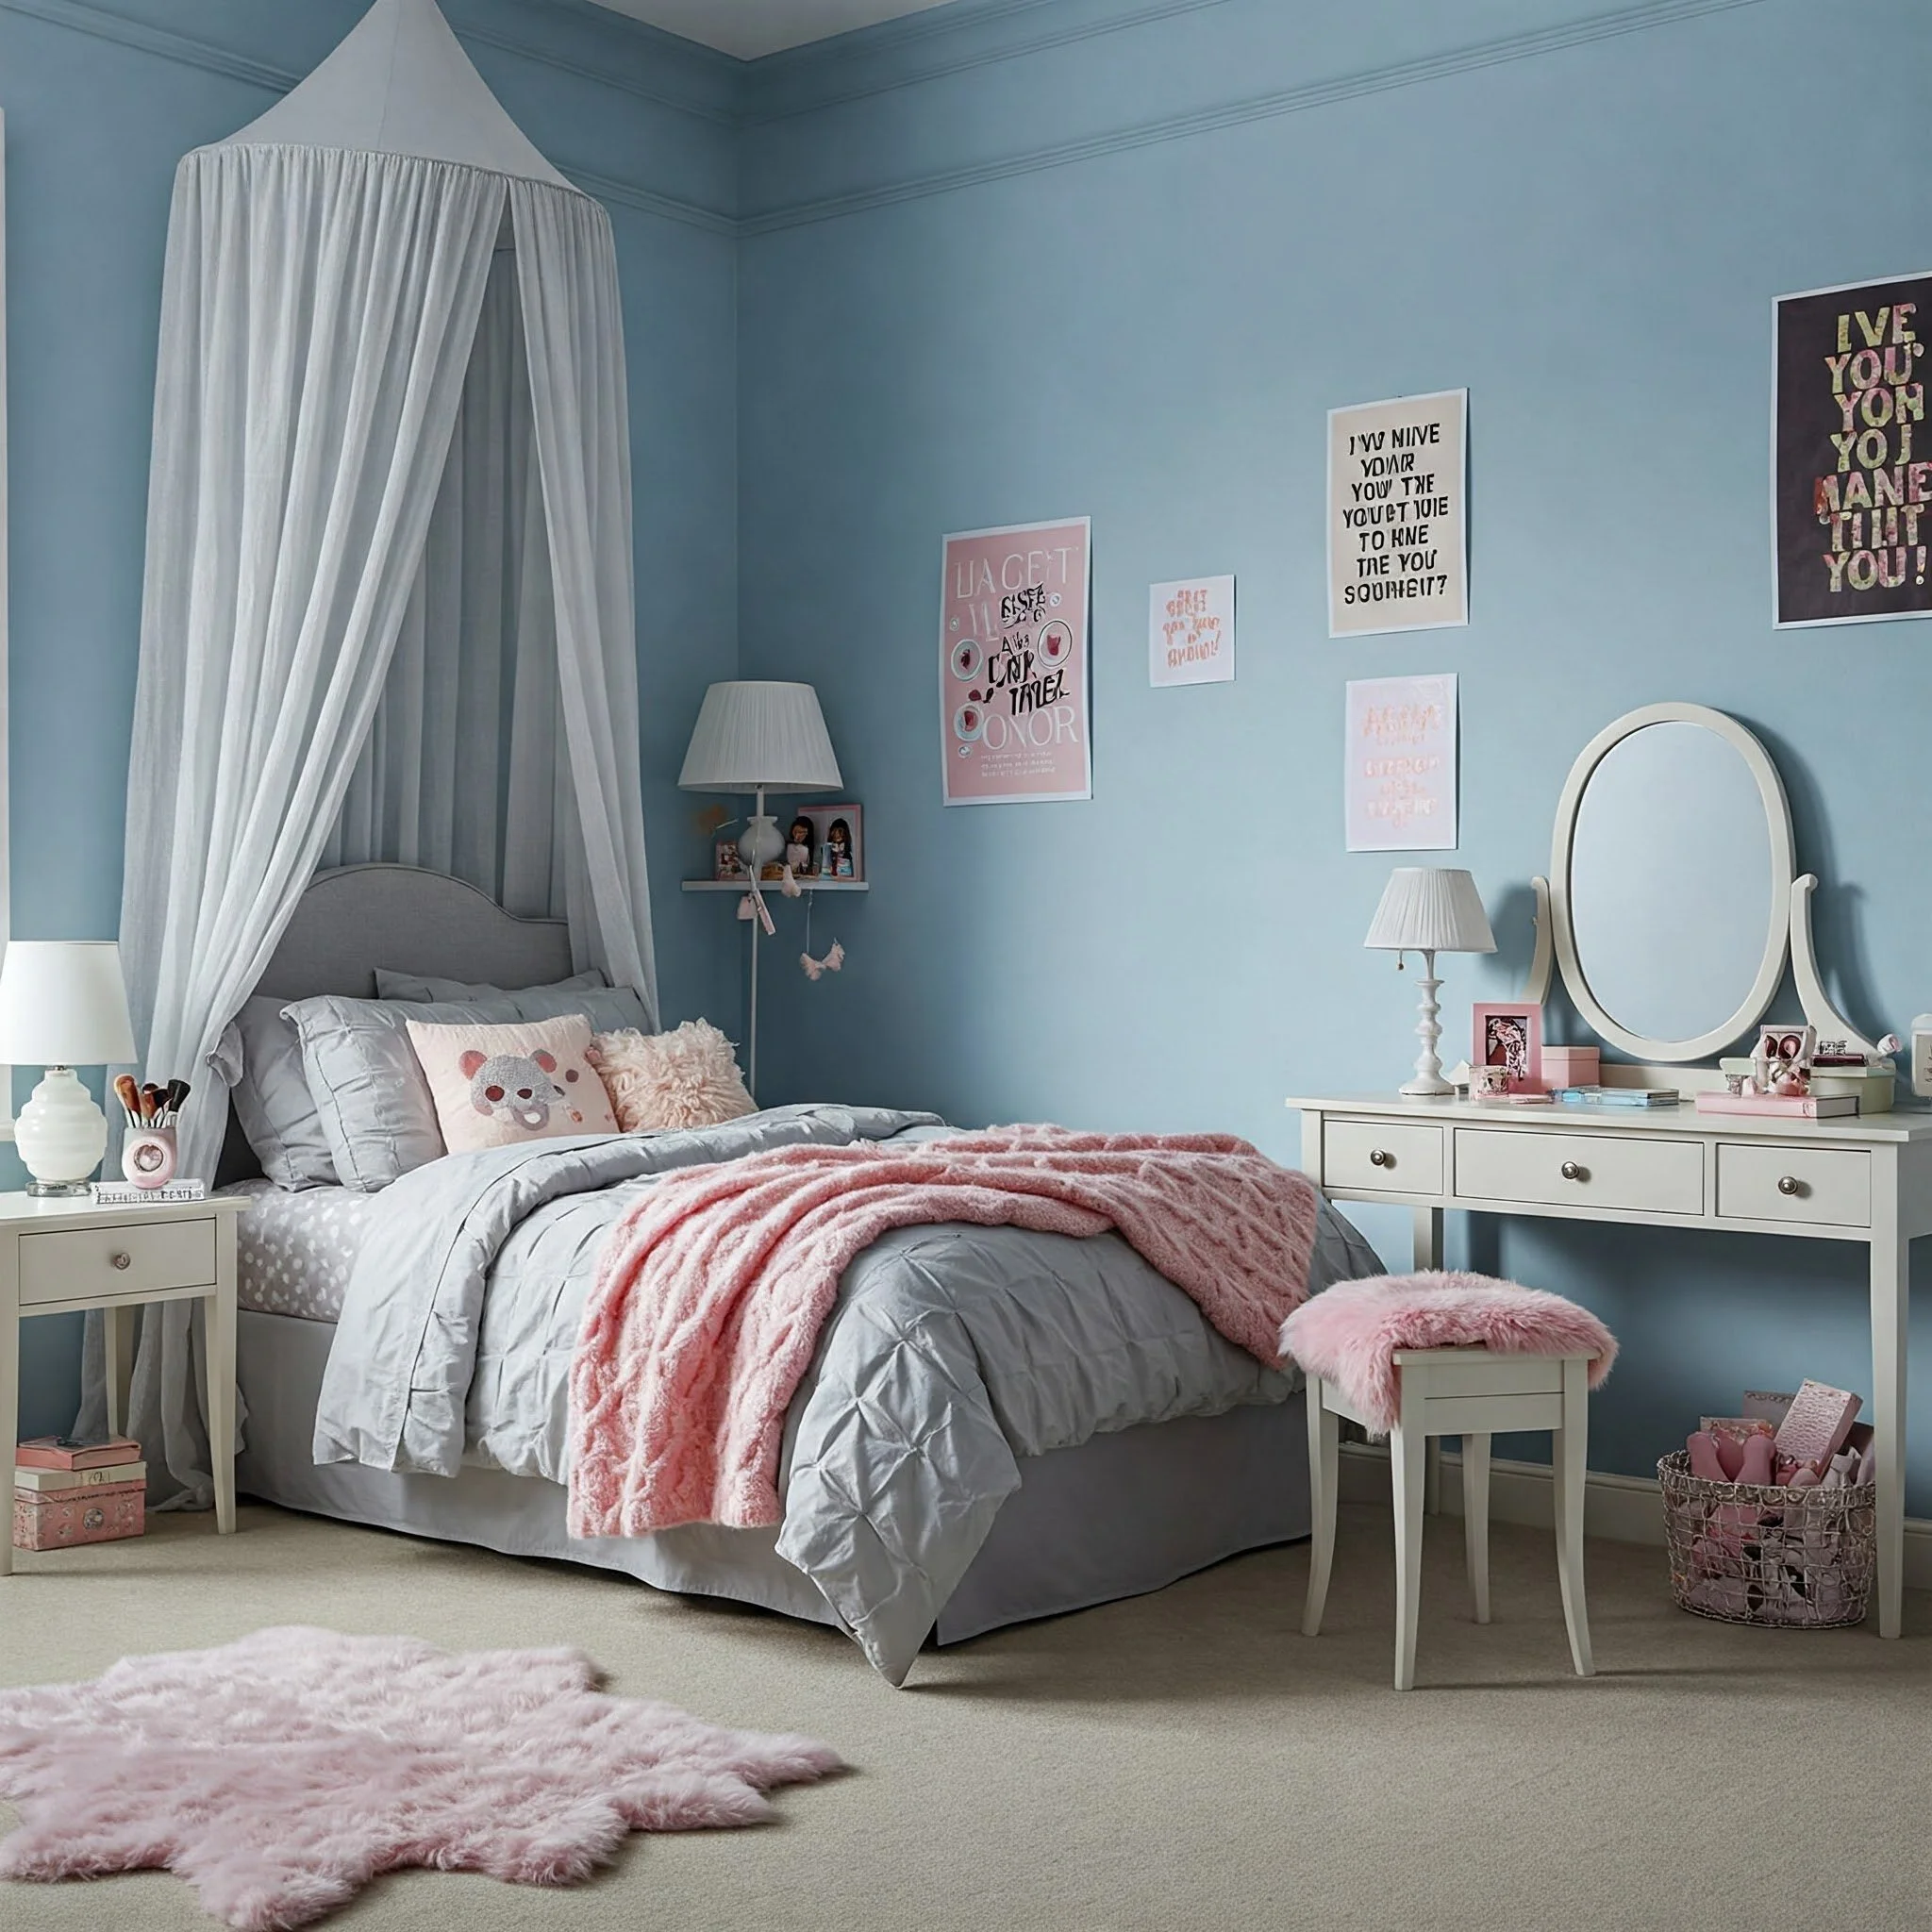
1. Neutral Color Schemes That Please Everyone
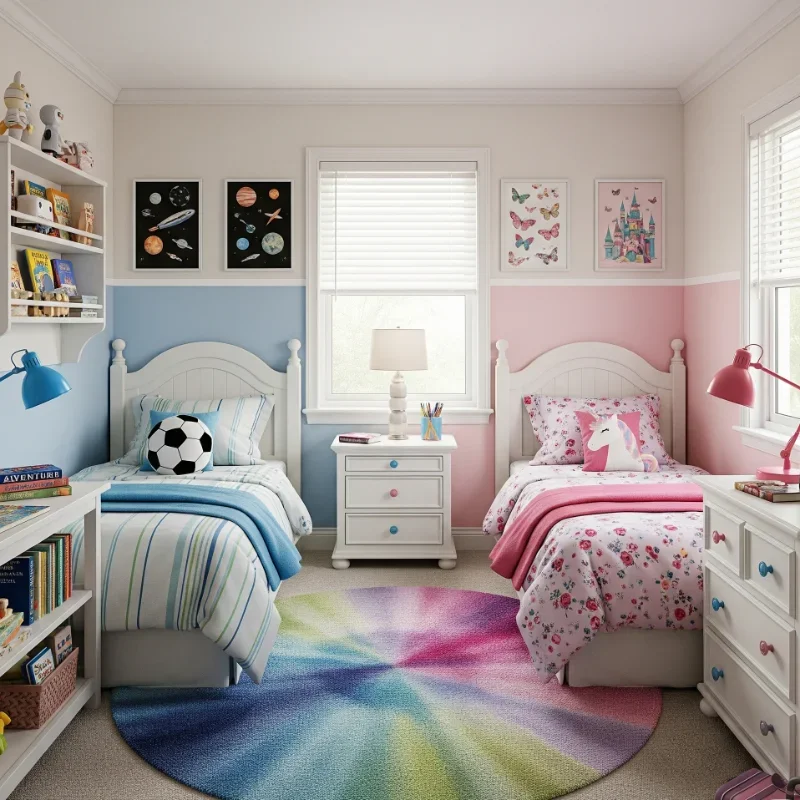
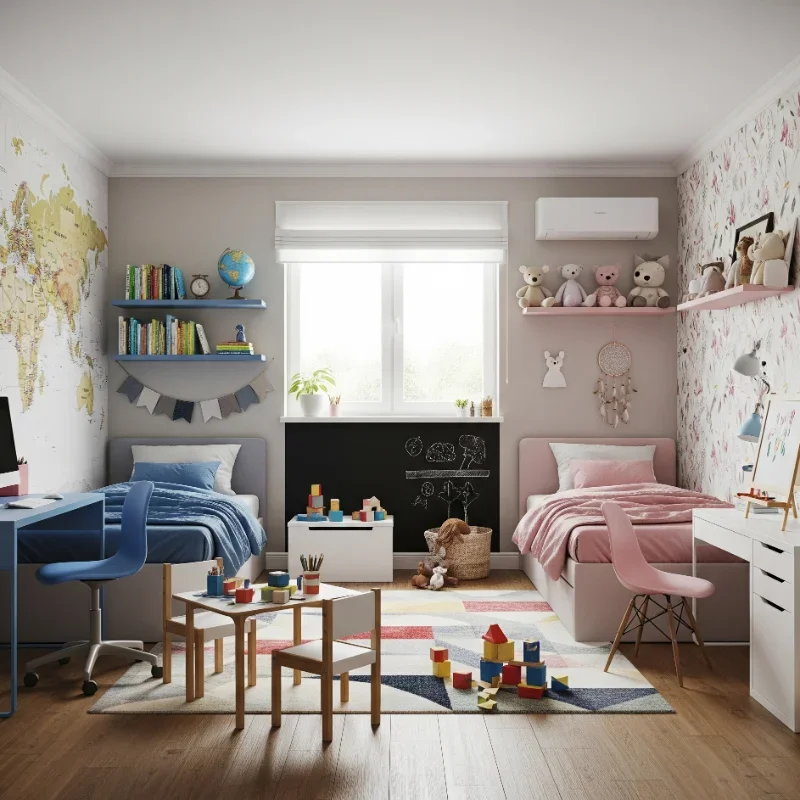
Skip the pink versus blue battle by choosing colors that make everyone happy! Gray has become the superhero of shared rooms, providing a sophisticated backdrop that works with any accent color. Add pops of each child's favorite hues through bedding, artwork, and accessories. White walls with colorful accents let personalities shine without overwhelming. Consider nature-inspired palettes: soft greens, warm beiges, or sky blues feel fresh and gender-neutral. The magic happens when you let each child choose their own bedding and wall art within the neutral framework. This approach grows with kids too; swap out accessories as tastes change without repainting. Navy and coral, mint and gray, or yellow and turquoise create unexpected harmony. Your neutral base becomes the peacekeeping force that unites different styles. Plus, neutral rooms photograph beautifully for those proud parent moments on social media!
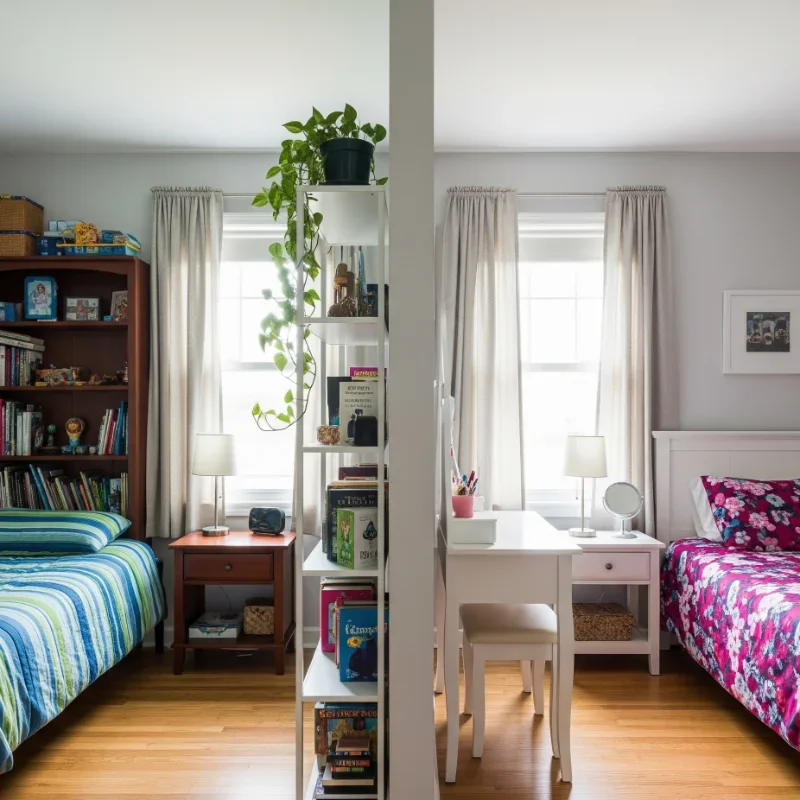
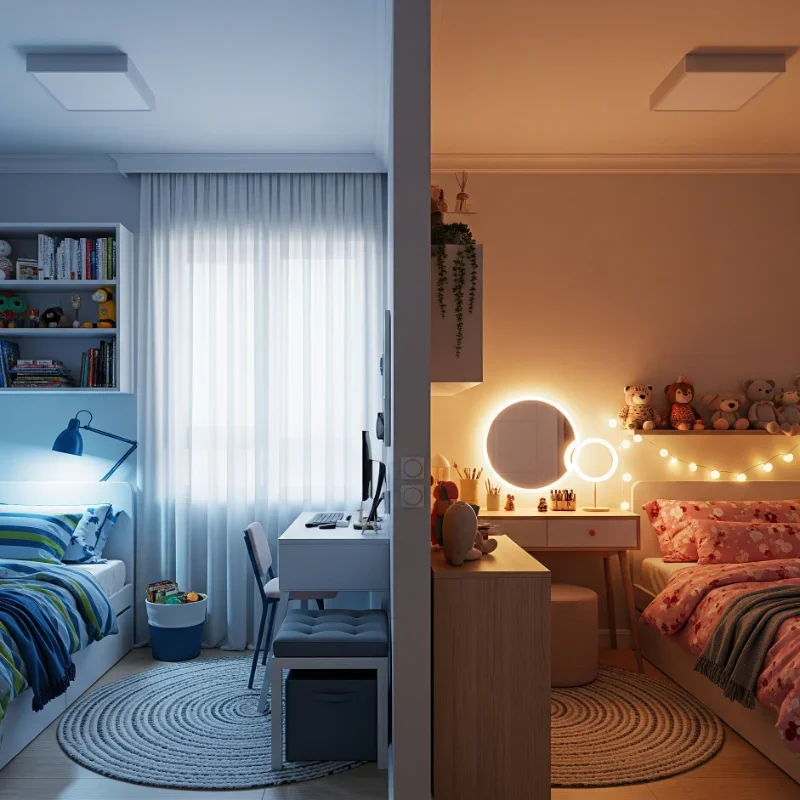
2. Dividing the Room with Curtains or Screens
Create instant privacy without construction by using curtains or screens as flexible room dividers! Ceiling-mounted curtain tracks allow kids to open their space for play or close it for alone time. Choose curtains in fun patterns that complement your color scheme, or go with simple white for a clean look. Folding screens offer portable privacy that moves as needs change. Consider bookshelf room dividers that provide storage while separating spaces. The beauty of soft dividers? They make small rooms feel less cramped than permanent walls. Kids love the control of opening and closing their "door" as needed. For a whimsical touch, use canopy curtains around each bed area. This solution costs less than building walls and adapts easily as children grow. Your room gains flexibility while each child gets that crucial sense of personal space.
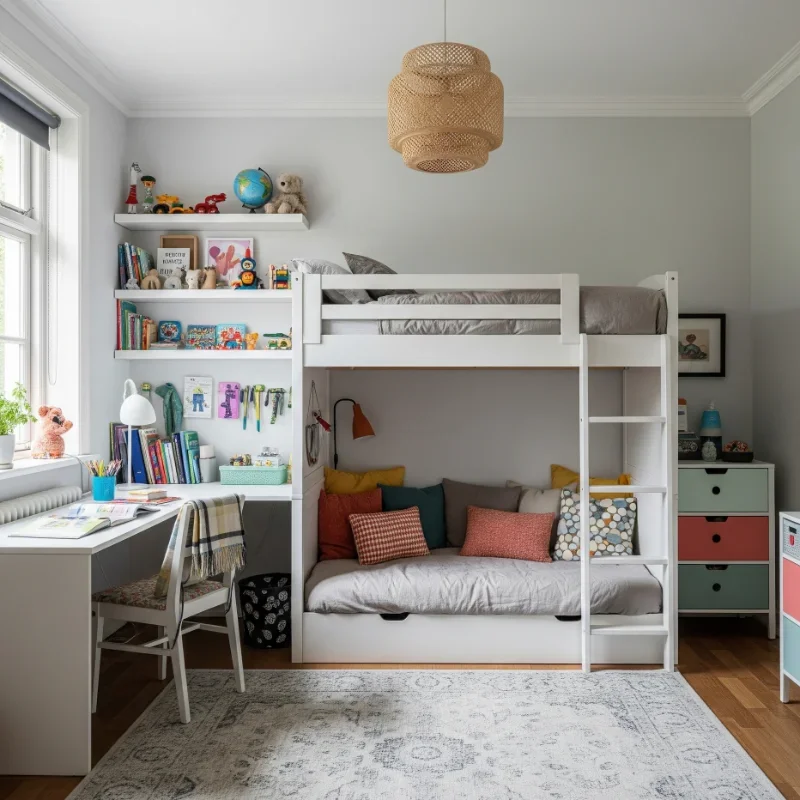
3. Bunk Bed Solutions for Space Saving
Maximize floor space with bunk beds that turn vertical space into sleep and play areas! Modern bunks go beyond basic stacked beds: L-shaped configurations create natural zones, while bunks with built-in desks maximize functionality. Let kids negotiate who gets top or bottom, or rotate monthly for fairness. Safety rails and sturdy ladders are non-negotiable. Consider bunks with curtains or tents for each level, giving both children their own fort. Twin-over-full bunks accommodate different ages or visiting friends. Some designs include built-in storage drawers or shelving. Position bunks to leave maximum open floor space for shared play. Add reading lights for each bunk so one child can sleep while the other reads. This classic solution has evolved into stylish options that look great while solving the space crunch. Your vertical thinking creates more room for activities and storage!
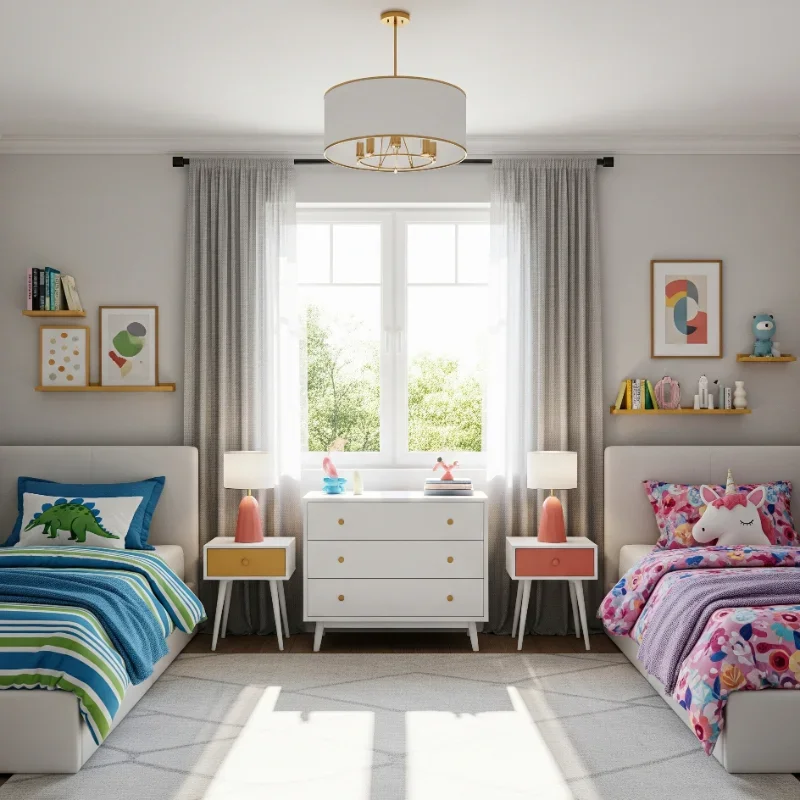
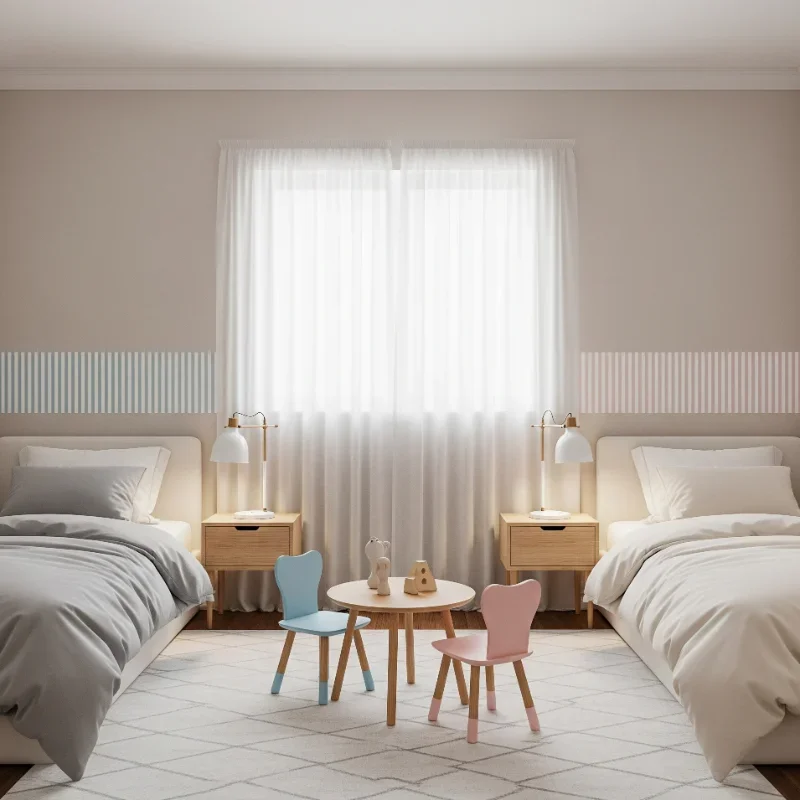
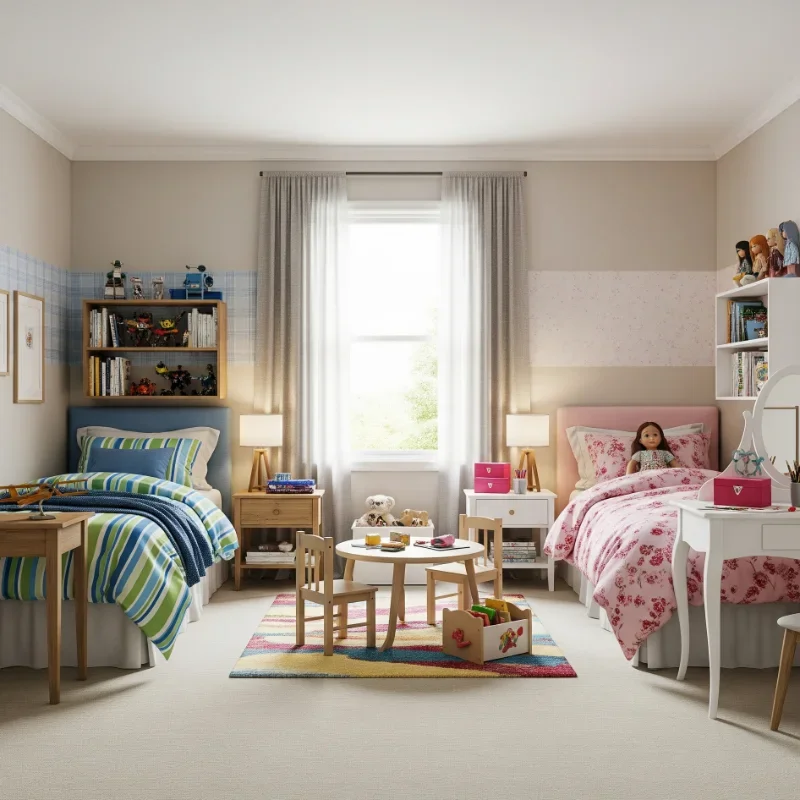
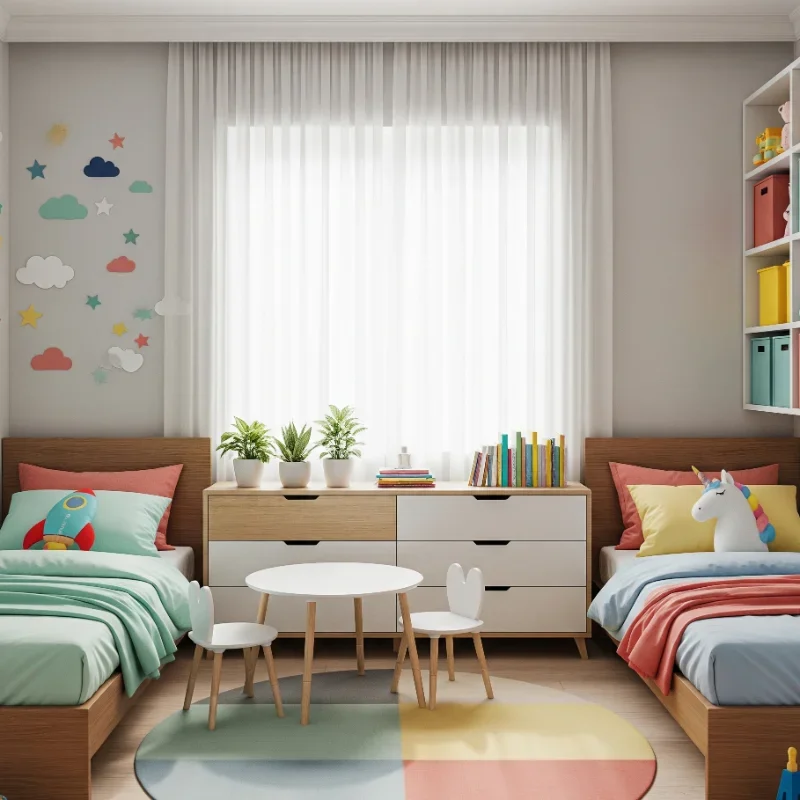
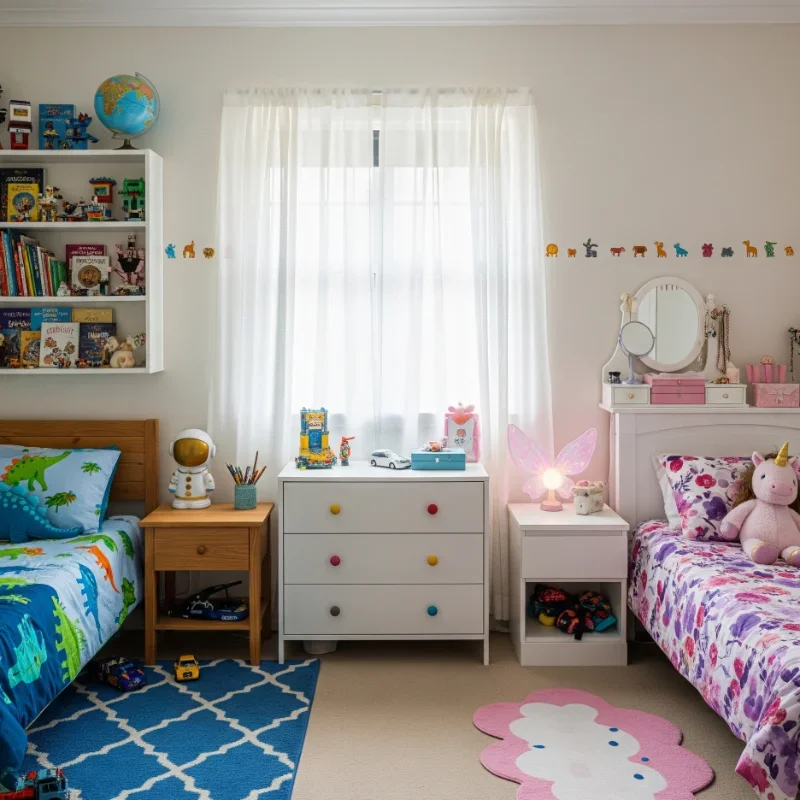
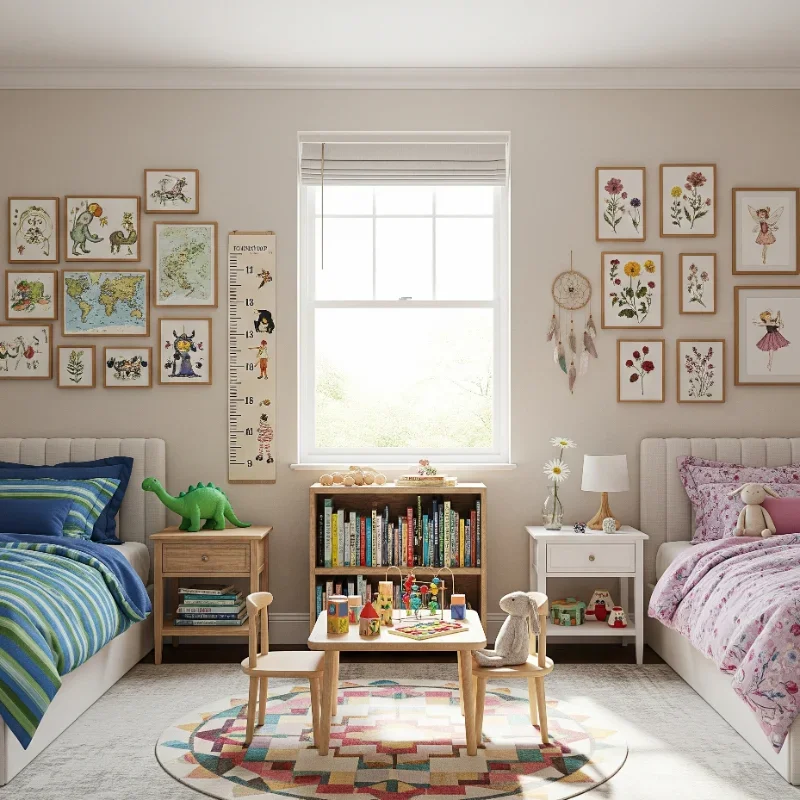
4. Individual Zones with Shared Common Areas
Design the room like a tiny apartment with private bedrooms and shared living space! Position beds on opposite walls or corners to create natural territories. Each child gets their own nightstand, wall space, and storage area. The center of the room becomes neutral territory for play, reading, or hanging out together. Use area rugs to define each zone visually: each child picks their own rug for their bed area. A shared play table or reading nook in the middle encourages sibling bonding. This layout respects individual space while promoting togetherness when desired. Clear boundaries reduce conflicts over territory invasion. Include a shared toy storage area accessible to both. This approach mirrors real-world living situations, teaching valuable lessons about respecting others' space. Your room becomes a miniature lesson in community living!
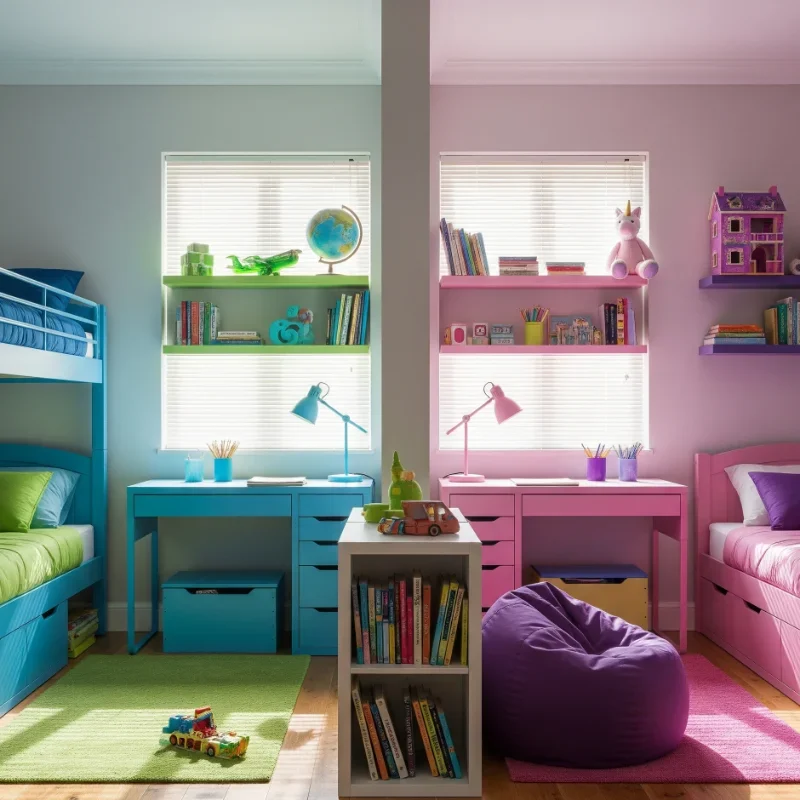
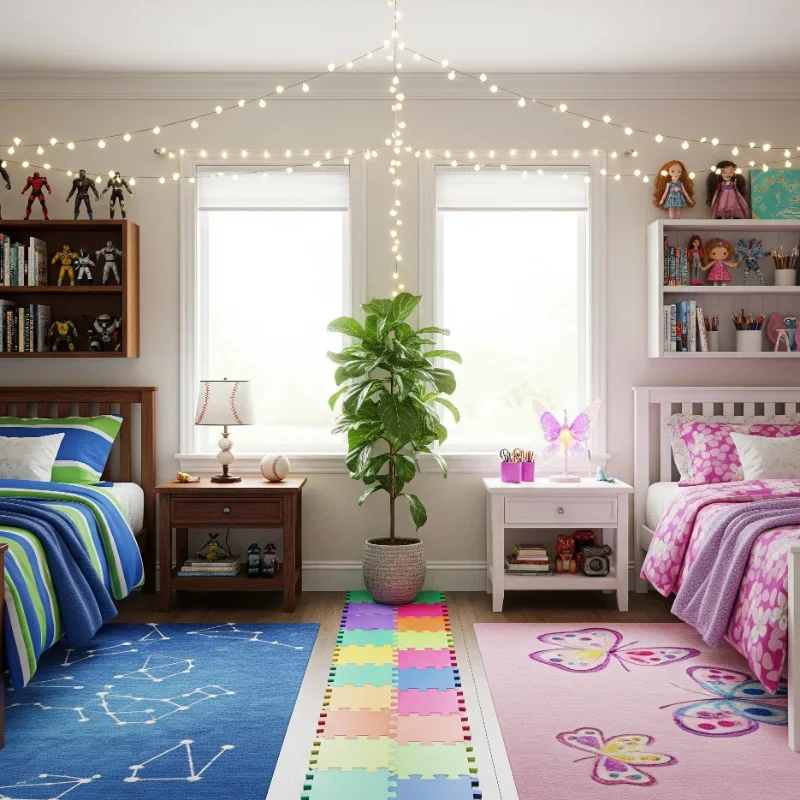
5. Color-Coded Organization Systems
Eliminate the "whose stuff is whose" arguments with brilliant color-coding! Assign each child a color for all their belongings: bins, hangers, towels, and labels. Blue bins for him, purple for her, or whatever colors they choose. This system makes cleanup easier and ownership crystal clear. Use colored tape to mark dresser drawers, shelf sections, and toy areas. Color-coded hooks keep backpacks and jackets organized. Even shared supplies can have designated spots marked by each child's color. The visual system works for kids who can't read yet. Parents can spot misplaced items instantly. This method extends beyond the bedroom: use the same colors in the bathroom and mudroom. Kids take pride in their color identity while learning organization skills. Your color system becomes a family language that simplifies daily life!
6. Gender-Neutral Themes That Work
Discover themes that excite both boys and girls without favoring either! Adventure themes like camping, space exploration, or world travel appeal to all kids. Create an under-the-sea room where both can be marine biologists. A reading nook library theme celebrates stories both children love. Woodland creatures, rainbow designs, or geometric patterns provide stylish neutrality. Sports themes can include various activities rather than one specific sport. Art studio themes let creativity rule with chalkboard walls and display areas. These themes grow with children better than character-specific decor. Focus on concepts rather than characters: science, nature, or music. Include elements each child specifically requests within the broader theme. The shared theme creates room unity while individual touches maintain personality. Your themed room becomes an imaginative playground that doesn't exclude anyone. Your themed room becomes an imaginative playground that doesn't exclude anyone—especially when it’s filled with engaging elements like animal books for kids to inspire curiosity and learning.
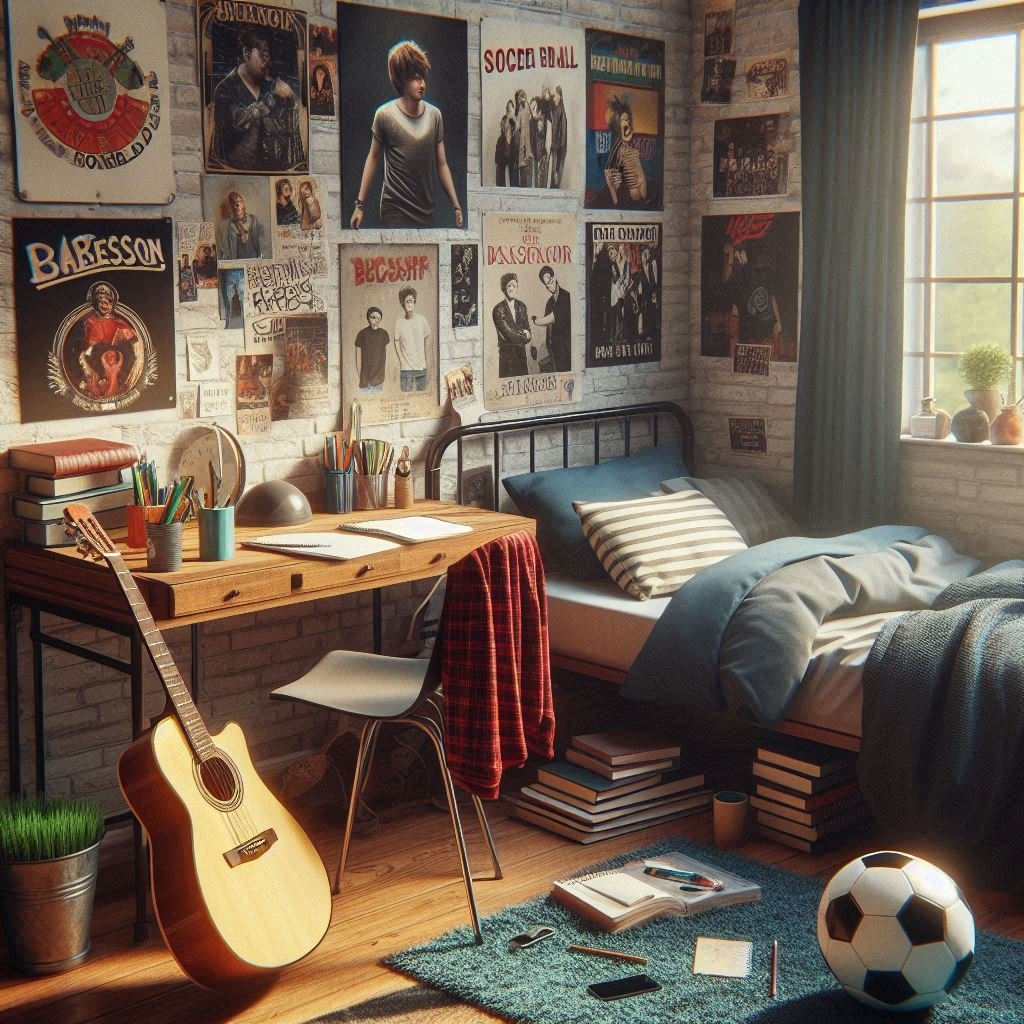
7. Personalized Wall Spaces for Each Child
Give each child their own wall to express themselves freely! Designate specific walls or wall sections as personal galleries. One child might display sports posters while the other hangs artwork. Use removable adhesive strips to protect walls from damage. Create matching frames in different colors for a cohesive look with individual flair. Include cork boards or magnetic boards for easy updates. Name signs or initial art clearly mark each territory. This solution satisfies the need for self-expression without creating visual chaos. Set boundaries: each child controls their wall within family-appropriate guidelines. The personal walls can evolve with changing interests. Photograph these walls periodically to document growing personalities. This approach validates each child's individuality while maintaining overall room harmony. Your walls become living scrapbooks of childhood!
8. Strategic Furniture Placement for Privacy
Arrange furniture to create natural privacy without feeling cramped! Position dressers or bookcases perpendicular to walls as subtle room dividers. Angle beds away from each other rather than parallel placement. Create cozy corners with chairs or bean bags for individual retreat spaces. Tall furniture pieces can section off areas without blocking light completely. Consider back-to-back desks for homework time with personal space. Use the closet strategically: divide it clearly or assign separate closets if you have two. Place beds so children aren't staring at each other when lying down. Strategic placement makes one room feel like two without major construction. Include a shared seating area that encourages togetherness when desired. This thoughtful arrangement respects both privacy needs and sibling bonding. Your furniture becomes architecture that shapes daily interactions!
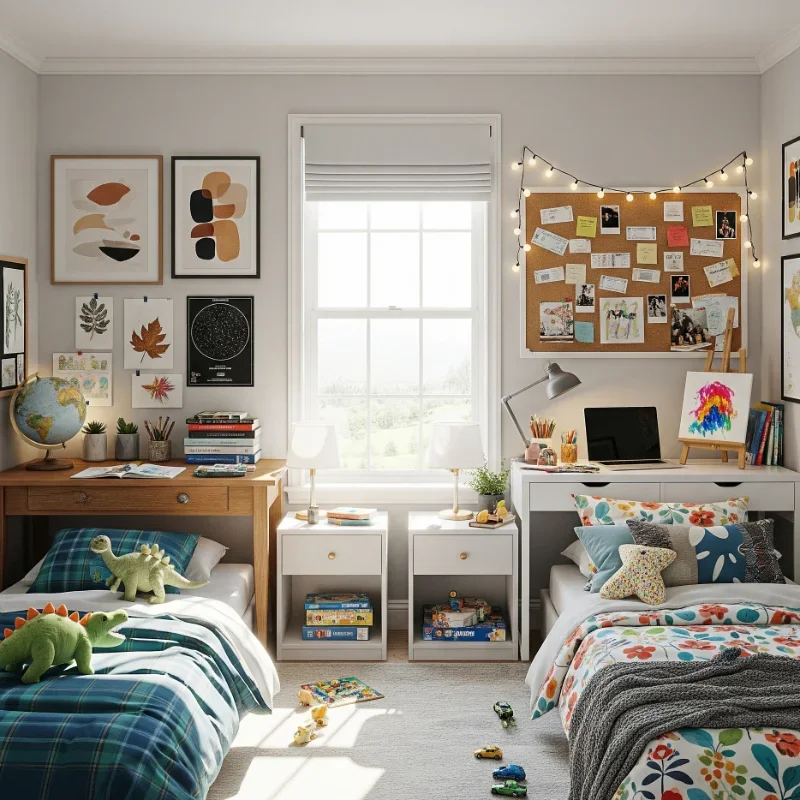
9. Shared Study Areas with Personal Touches
Create homework zones that promote focus while respecting individual styles! A long desk with two distinct sections works better than separate desks in tight spaces. Each child gets their own lamp, supplies caddy, and inspiration board. Use desktop dividers during homework time for concentration. Color-code supplies and label everything clearly. Include comfortable chairs that adjust for different heights. Wall-mounted shelves above each section hold personal books and treasures. Good lighting prevents squabbles over shadows or glare. Position the study area near a window for natural light when possible. Shared resources like printers or craft supplies get neutral middle placement. This setup teaches cooperation while maintaining individual work styles. Your study area becomes command central for academic success without sibling sabotage!
10. Storage Solutions That Prevent Conflicts
Smart storage stops fights before they start! Invest in labeled bins, baskets, and containers for everything. Under-bed storage maximizes space while keeping treasures separate. Closet organizers with designated sections prevent clothing mix-ups. Toy rotation systems keep clutter manageable: store some toys and swap monthly. Wall-mounted storage frees floor space and clearly shows ownership. Include a shared bin for toys both children use together. Lock boxes or special drawers protect precious items from curious siblings. Clear containers let kids see contents without dumping everything out. The key is making organization easier than chaos. Regular decluttering sessions teach letting go of outgrown items. Your storage system becomes the backbone of peaceful coexistence!
11. Lighting Options for Different Needs
Illuminate individual needs without disturbing roommates! Each bed needs its own reading light: clip-on, wall-mounted, or bedside lamps. Dimmer switches on overhead lighting accommodate different sleep schedules. Night lights provide security without disrupting sleep. Consider smart bulbs that change colors for different moods or activities. Blackout curtains help early risers avoid waking night owls. Task lighting at desks prevents eye strain during homework. String lights add ambiance without harsh brightness. Battery-operated options eliminate cord conflicts. Position lights to avoid shining in siblings' eyes. Include a sunrise alarm clock for gentle wake-ups. This layered lighting approach respects different rhythms and activities. Your lighting plan keeps peace during those tricky bedtime transitions!
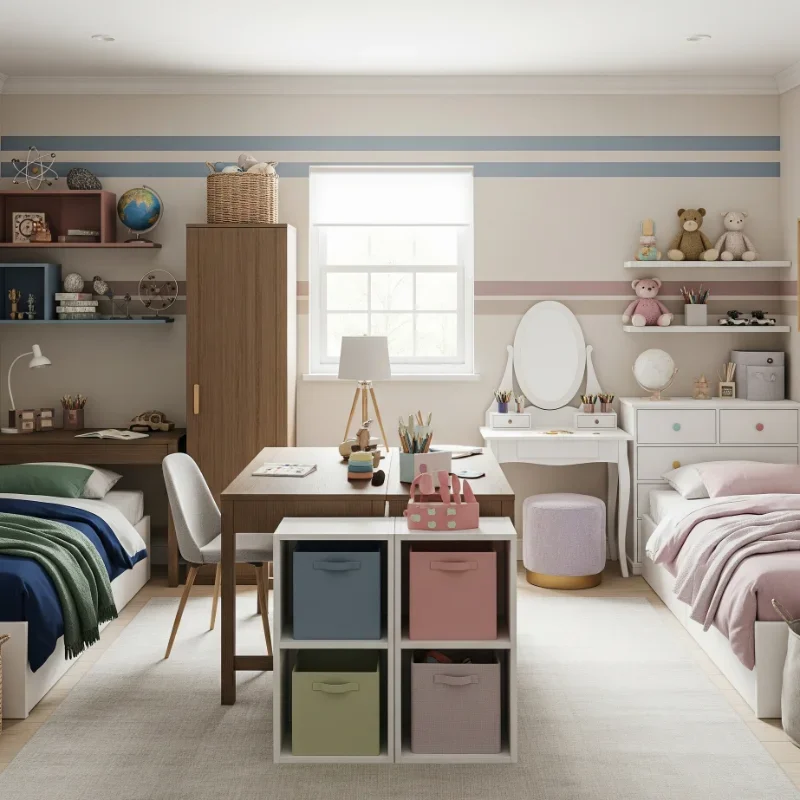
12. Age-Appropriate Adaptable Designs
Design with growth in mind to accommodate changing needs! Choose furniture that adjusts: beds that extend, desks that raise, shelving that reconfigures. Avoid character themes that quickly become embarrassing. Focus on quality basics that accept changing decorations. Include elements appropriate for the oldest child to prevent "babyish" complaints. Plan for privacy needs increasing with age. Consider how the room will function when kids are teens. Modular furniture adapts to new configurations easily. Leave room for evolving interests: sports equipment, musical instruments, or collections. Design storage that transitions from toys to books to electronics. This forward-thinking approach saves money and reduces renovation stress. Your adaptable room grows gracefully with your children!
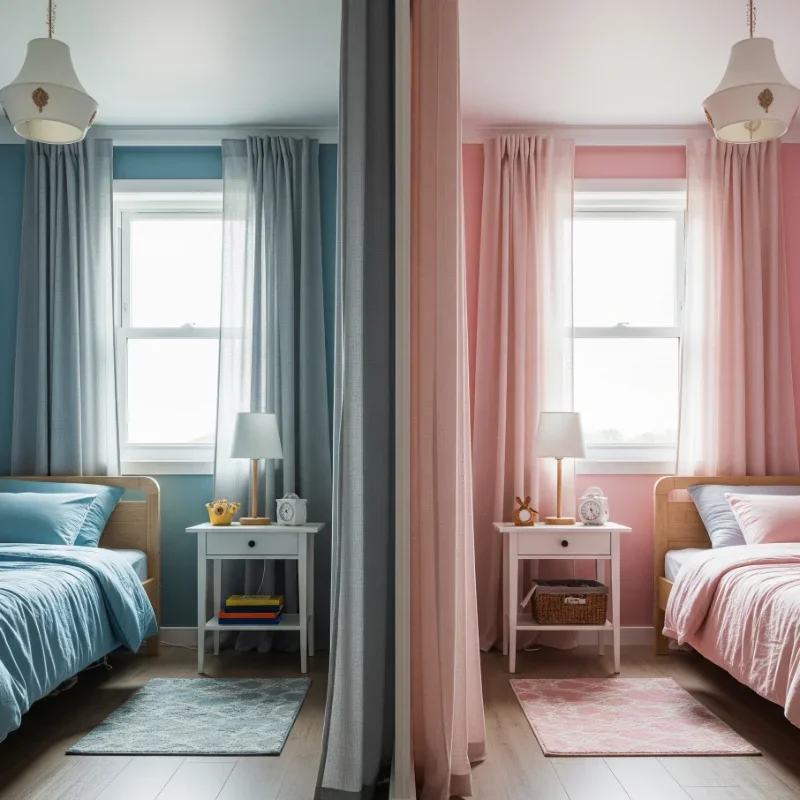
13. Creating Visual Boundaries Without Walls
Use creative methods to define personal space visually! Paint techniques like color blocking or geometric designs create clear zones. Different area rugs for each bed area establish territories. Ceiling treatments like painted sections or hanging mobiles mark air space. Use washi tape to create fun floor boundaries that don't damage surfaces. Lighting can define areas: different fixture styles for each zone. Canopies or bed tents create individual retreats within shared space. Wall decals or murals can designate areas without permanent changes. These visual cues help young children understand boundaries. Change tape lines or decorations as children grow and needs shift. The visual boundaries make sharing feel more intentional and less imposed. Your creative divisions turn one room into clearly defined personal spaces!
14. Compromise Decor That Satisfies Both
Master the art of decorative diplomacy with choices everyone loves! Instead of one child's favorite character everywhere, find common ground. Animals, nature scenes, or abstract patterns often please both genders. Let each child choose one major decorative element: bedding, wall art, or rug. Mix patterns and solids to balance different preferences. Include family photos showing both children for unity. Compromise on window treatments: perhaps blinds plus curtains satisfy both preferences. Find bedding sets in coordinating but not matching patterns. This approach teaches negotiation and considering others' feelings. Display both children's artwork equally in shared spaces. The compromised decor shows that everyone's opinion matters. Your balanced room becomes a model for future roommate success!
15. Flexible Layouts That Grow with Kids
Create room arrangements that easily adapt to changing needs! Use lightweight, moveable furniture instead of built-ins. Design multiple layout options and switch them seasonally or as needs change. Include multi-functional pieces: storage ottomans, trundle beds, or nesting tables. Leave open floor space for reconfiguration. Consider furniture on wheels for easy rearranging. Plan electrical outlets and lighting for various configurations. Document successful layouts with photos for future reference. Involve kids in rearranging decisions to build buy-in. This flexibility accommodates changing friendships, interests, and privacy needs. Test new layouts for a week before committing. Regular rearranging keeps the room fresh and exciting. Your flexible design philosophy turns room sharing into an evolving adventure!
Conclusion
Creating a successful shared room for boys and girls isn't about perfection; it's about balance, respect, and creativity. These 15 ideas prove that with thoughtful planning and smart solutions, siblings can share space harmoniously while maintaining their individuality. Remember, the best shared room is one where both children feel heard, respected, and at home. Start with one or two ideas and build from there. Your peaceful, functional shared room is totally achievable!
Read next: 15 Toddler Boy Bedroom Ideas for Cozy Comfort
Frequently Asked Questions
Q1: What's the ideal age gap for room sharing?
A: 2-4 years works well; larger gaps may require more creative privacy solutions eventually.
Q2: When should boys and girls stop sharing rooms?
A: Most experts suggest by age 10 or when either child requests privacy consistently.
Q3: How do I handle different bedtimes?
A: Use curtains, white noise machines, and separate reading lights for independent schedules.
Q4: What if my kids have opposite decorating styles?
A: Focus on neutral bases with personal accents, and designate individual expression zones.
Q5: How can I prevent constant territory battles?
A: Clear boundaries, labeled storage, and consistent rules about respecting each other's space.
Stay up to date with our latest ideas!